You're in a busy grocery-store parking lot on a Saturday afternoon. Cars are circling, a tight space has opened beside a cart corral, and the driver behind you is waiting. You signal, slow down, and suddenly question every steering movement you've practiced. The space is large enough, but your confidence disappears when the situation becomes real.
Learning how to improve parking skills means turning that pressure into a repeatable routine. Parking isn't one mysterious talent. It's a sequence of small decisions about speed, steering angle, mirror checks, reference points, and stopping distance. With deliberate practice, those decisions become calmer and more consistent.
Why Parking Skills Deserve Real Practice
Most drivers practice braking and turning without planning to. Every trip includes stop signs, traffic lights, curves, and lane changes. Parking is different. You may perform it repeatedly during a normal outing, but you often practice only when a real space appears, with other vehicles waiting and no chance to reset.
That makes parking feel harder than it needs to be. One rushed maneuver can lead to curb rash, a crooked vehicle, a blocked neighboring car, or a honk from someone who wants to pass. For a new permit holder, parking errors can also become a major reason a road-test attempt goes poorly.
Backing deserves special attention because the risk is concentrated in a short part of a trip. The National Safety Council estimates that drivers spend less than 1% of driving time in reverse, while about one-quarter of collisions happen while backing. NHTSA-backed materials estimate around 210 deaths and 15,000 injuries each year from backing crashes in the United States. The backing-safety training material explains why slow control, mirror checks, shoulder checks, and rear visibility systems matter so much.
Treat parking like a skill sequence
A calm instructor doesn't ask you to “just feel” where the car is. Instead, practice one decision at a time:
- Control speed: Keep the car slow enough that you can stop without panic.
- Choose a reference point: Use a mirror, door hinge, hood mark, or stall line.
- Turn with purpose: Make one deliberate steering input instead of several hurried corrections.
- Pause and scan: Stop whenever you lose sight of a person, cart, curb, or vehicle.
- Finish deliberately: Check the final position before selecting Park.
Parking environments also reward scenario-based practice. The benefits of scenario based training are especially relevant here because learners can rehearse decisions in realistic situations instead of waiting for stressful moments to appear by chance. You'll find more foundational guidance in this guide to improving driving skills.
The aim isn't to park quickly on your first attempt. It's to repeat the same process until your hands, eyes, and feet work together. A short practice session with clear feedback teaches more than several weeks of accidental parking.
Setting Up the Car Before You Move
Before you move toward a space, create the same starting position every time. A predictable setup reduces the number of things you have to solve once the car is moving.
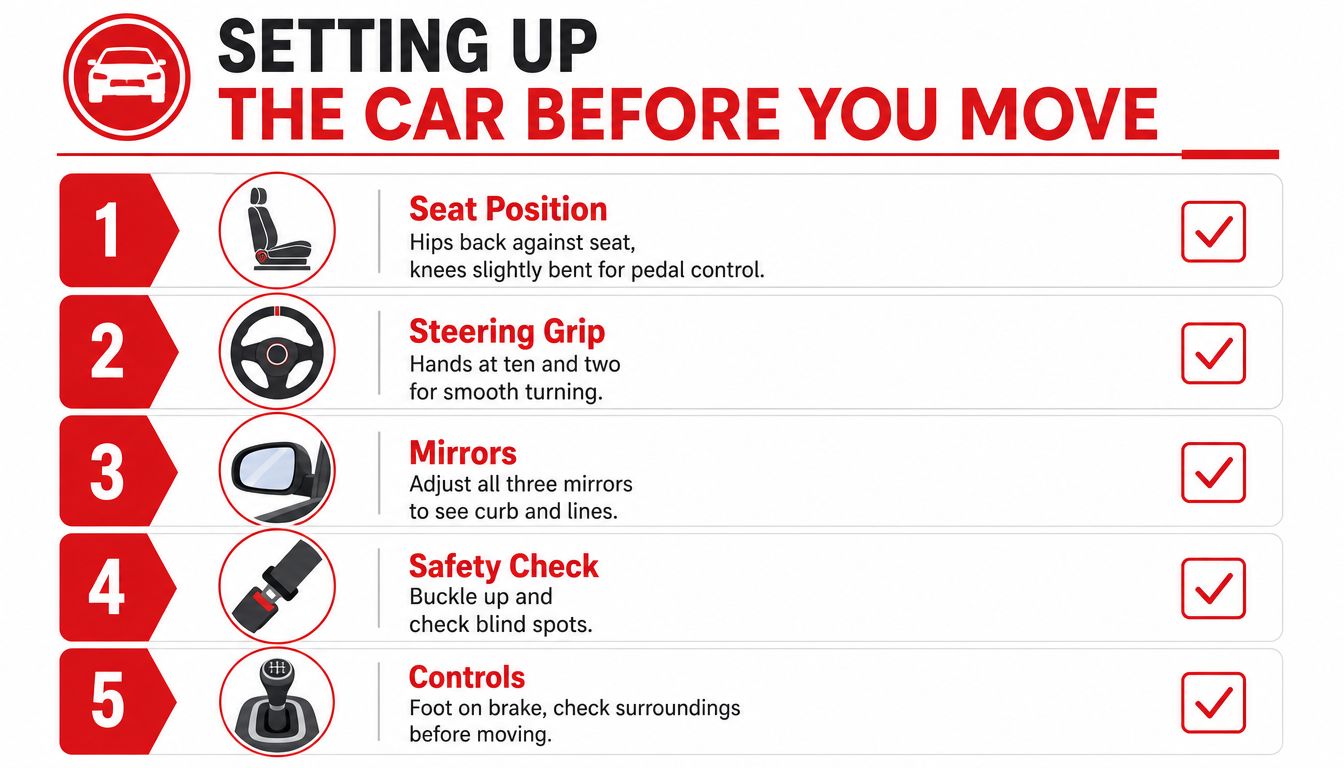
Start with the seat. Sit with your hips back against the seat, your knees slightly bent, and your arms relaxed. If you drive a manual vehicle, your left foot should reach the clutch fully without stretching. In an automatic, your left foot can rest comfortably away from the pedals. Your body should be stable enough to turn and look over your shoulder without sliding forward.
Set your hands at ten and two for ordinary low-speed control, then use a hand-over-hand grip when a tight maneuver requires more steering input. Keep your shoulders loose. A stiff upper body often makes a learner grip the wheel too hard and overcorrect.
Make the mirrors useful
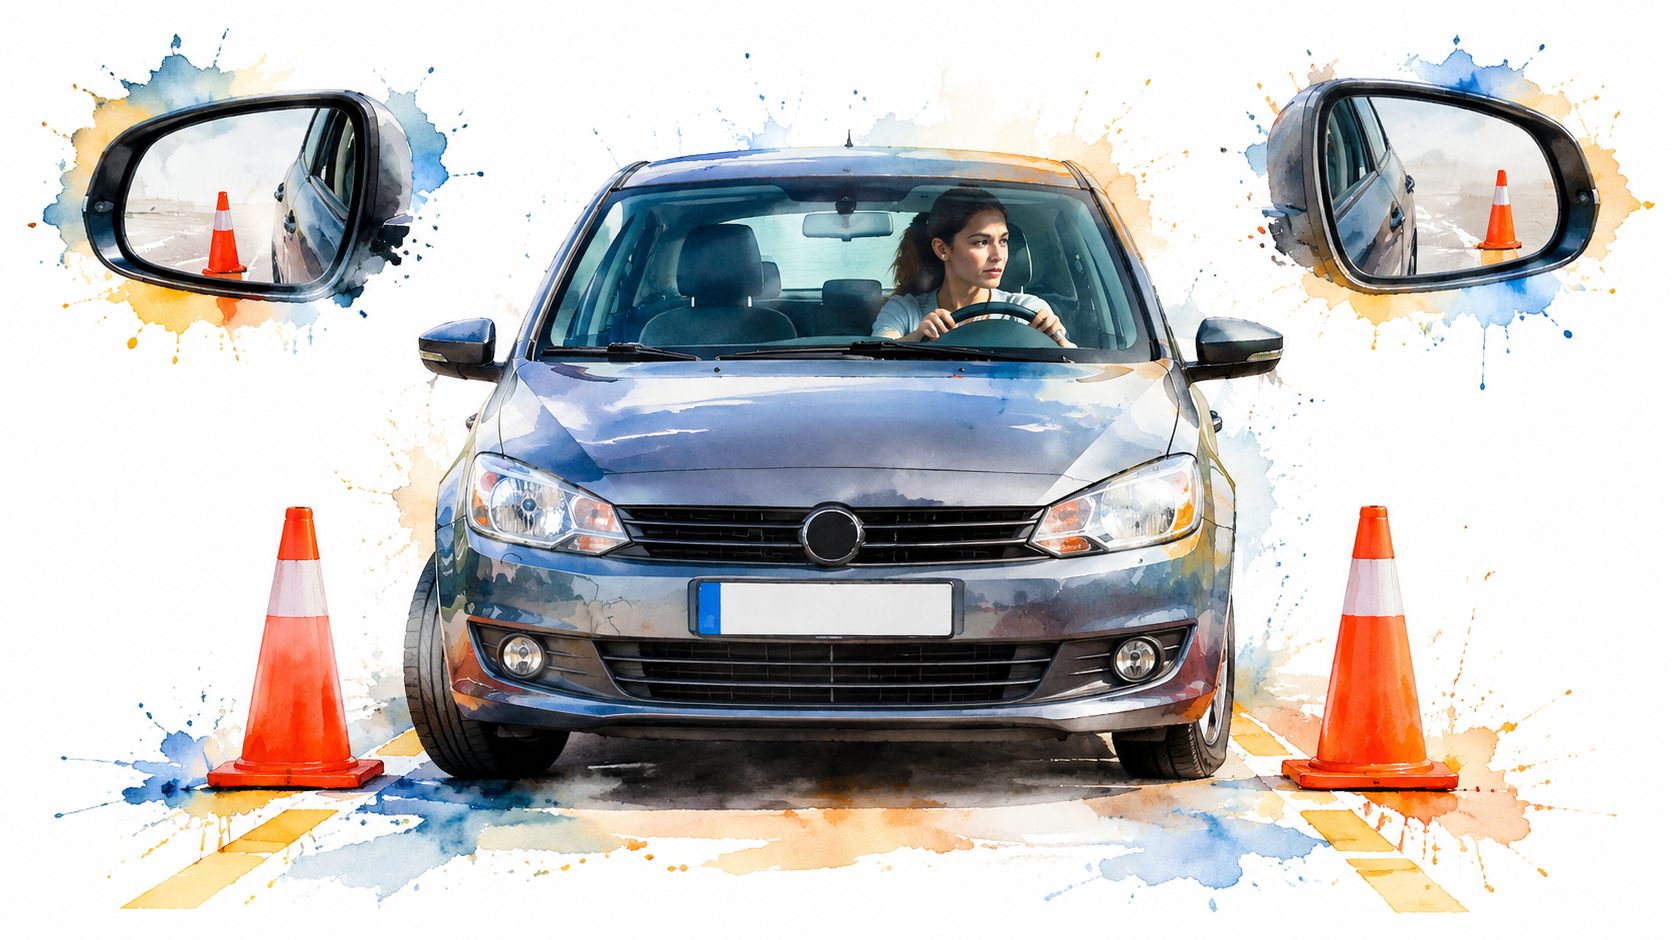
Adjust the side mirrors so you can see the rear tire area and the space beside the vehicle without aiming the entire mirror at the car's body. The rear tire of the car behind you should be just visible near the inner edge when the view allows it. Set the center mirror so it frames the rear window.
Don't treat mirror setup as a one-time job. If another driver changed the seat or mirrors, your familiar reference points may no longer work. The vehicle inspection checklist can help you build a broader pre-drive habit around controls and visibility.
Some learners use a small piece of bright, removable tape on the steering wheel, aligned with the hood emblem. At regular intervals during practice, such as when the vehicle has moved about five feet, that mark can help you judge the car's centerline. It isn't a universal measurement, so use it as a personal landmark and confirm it against mirrors and lines.
Before moving, run this four-item check:
- Seat: Can you reach every pedal and turn your body safely?
- Mirrors: Can you see the curb, stall lines, and nearby vehicles?
- Reference point: Do you know which mark or line will guide the maneuver?
- Surroundings: Have you checked pedestrians, carts, posts, blind spots, and traffic?
If the car has a manual transmission, confirm the shift pattern before the maneuver and keep clutch movements smooth. In any car, keep your foot ready over the brake. Low speed gives your eyes time to work.
Parallel Parking Step by Step
Parallel parking becomes less intimidating when you use one reference point from beginning to end. You're not trying to memorize a dramatic steering trick. You're placing the car beside the space, backing through a controlled arc, then straightening it into position.
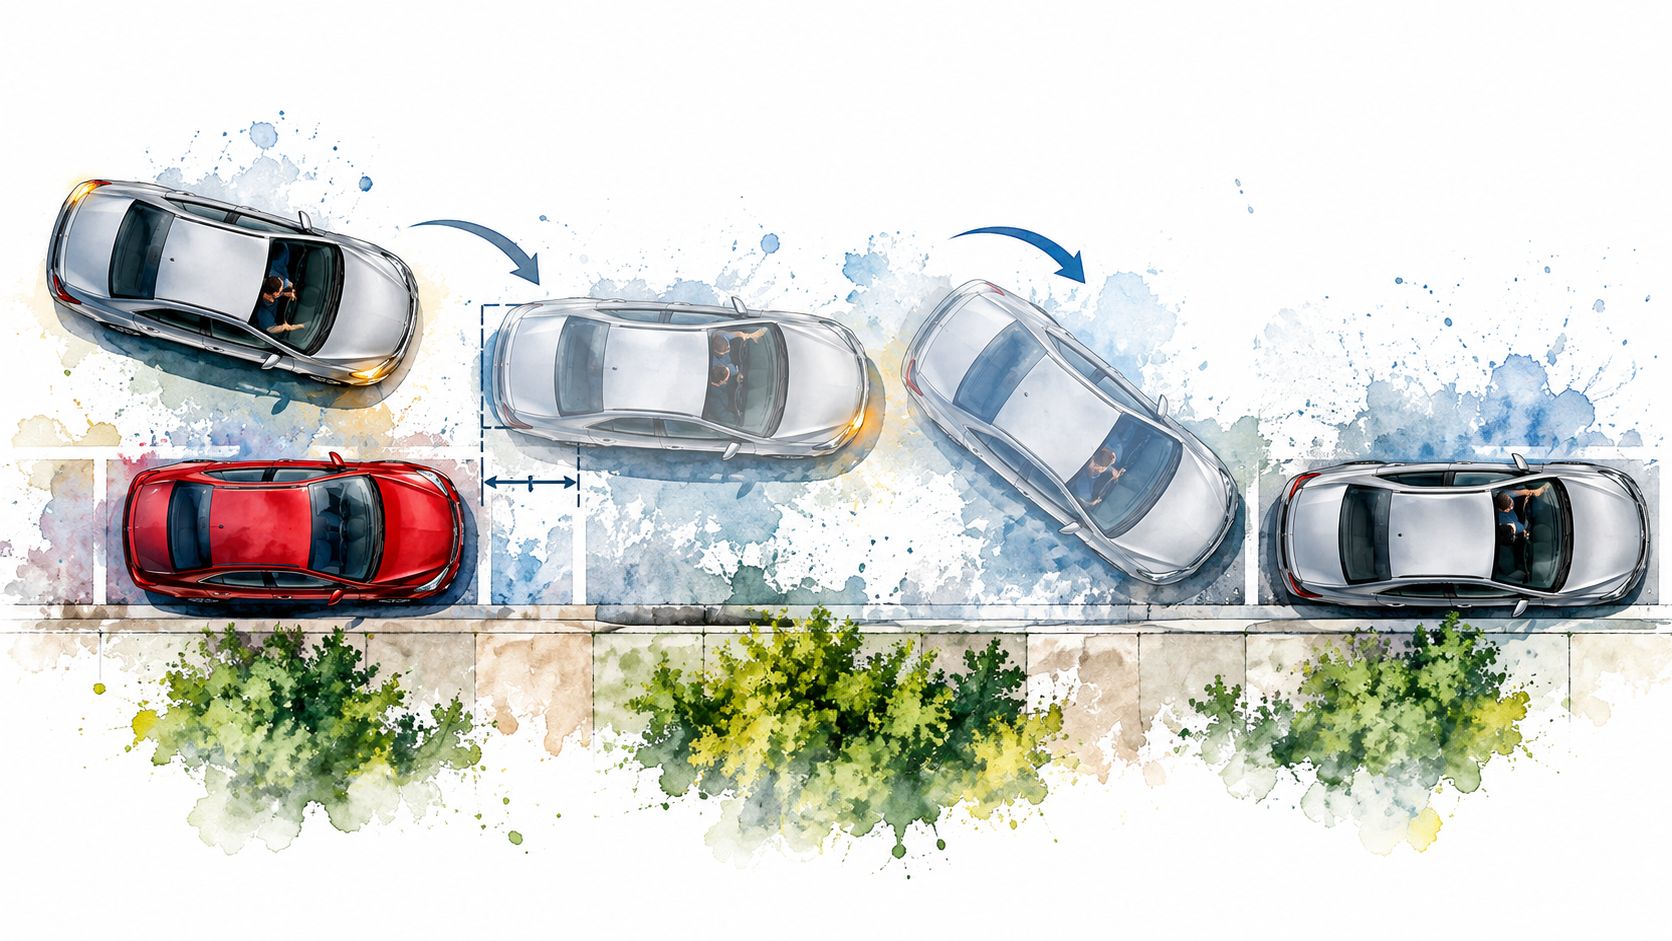
Signal before you pull alongside the open space. Stop roughly two feet from the parked car in front of the space, with your rear bumper aligned with that car's rear bumper. This position gives you a repeatable starting point. If you start too far forward, the rear of your vehicle may not enter the space cleanly. If you start too close, the front corner can feel uncomfortably near the other car.
Follow the three steering stages
-
Reverse straight. Check your mirrors and look over your right shoulder. Reverse slowly with the wheels straight until your chosen reference point, such as the other car's rear bumper, passes the rear door hinge area.
-
Turn toward the curb. Rotate the wheel firmly toward the curb while continuing at walking speed. Watch the front vehicle in the right mirror. When it appears at roughly a 45-degree angle, pause if you need to confirm your position.
-
Straighten the vehicle. Turn the wheel back toward center and continue reversing. Keep scanning the curb, the rear corner, and the vehicles around you. When the curb appears in the corner of the right mirror, prepare for the final steering input.
-
Turn away from the curb. Crank the wheel away from the curb and ease backward until the vehicle becomes parallel with the street.
Stop with about one foot between the tires and the curb when conditions allow, and check that the front and rear clearances look reasonably balanced. Your vehicle doesn't need to be perfectly centered on the first attempt, but it shouldn't block a driveway, sit far from the curb, or crowd another car.
Practical rule: If the nose swings wide, stop. Pull forward slightly with the wheels turned away from the curb, straighten the vehicle, and reset rather than forcing the reverse angle.
Use the same starting position repeatedly in an empty or quiet area. Have a spotter stand where they can remain visible, and stop immediately if you lose track of them. This parallel-parking demonstration can support your visual practice, but video shouldn't replace checking your own vehicle's dimensions.
Your car may reach the reference points at slightly different moments from another car. Learn the sequence, then adjust the landmarks to match your vehicle.
Perpendicular and Angled Parking Made Simple
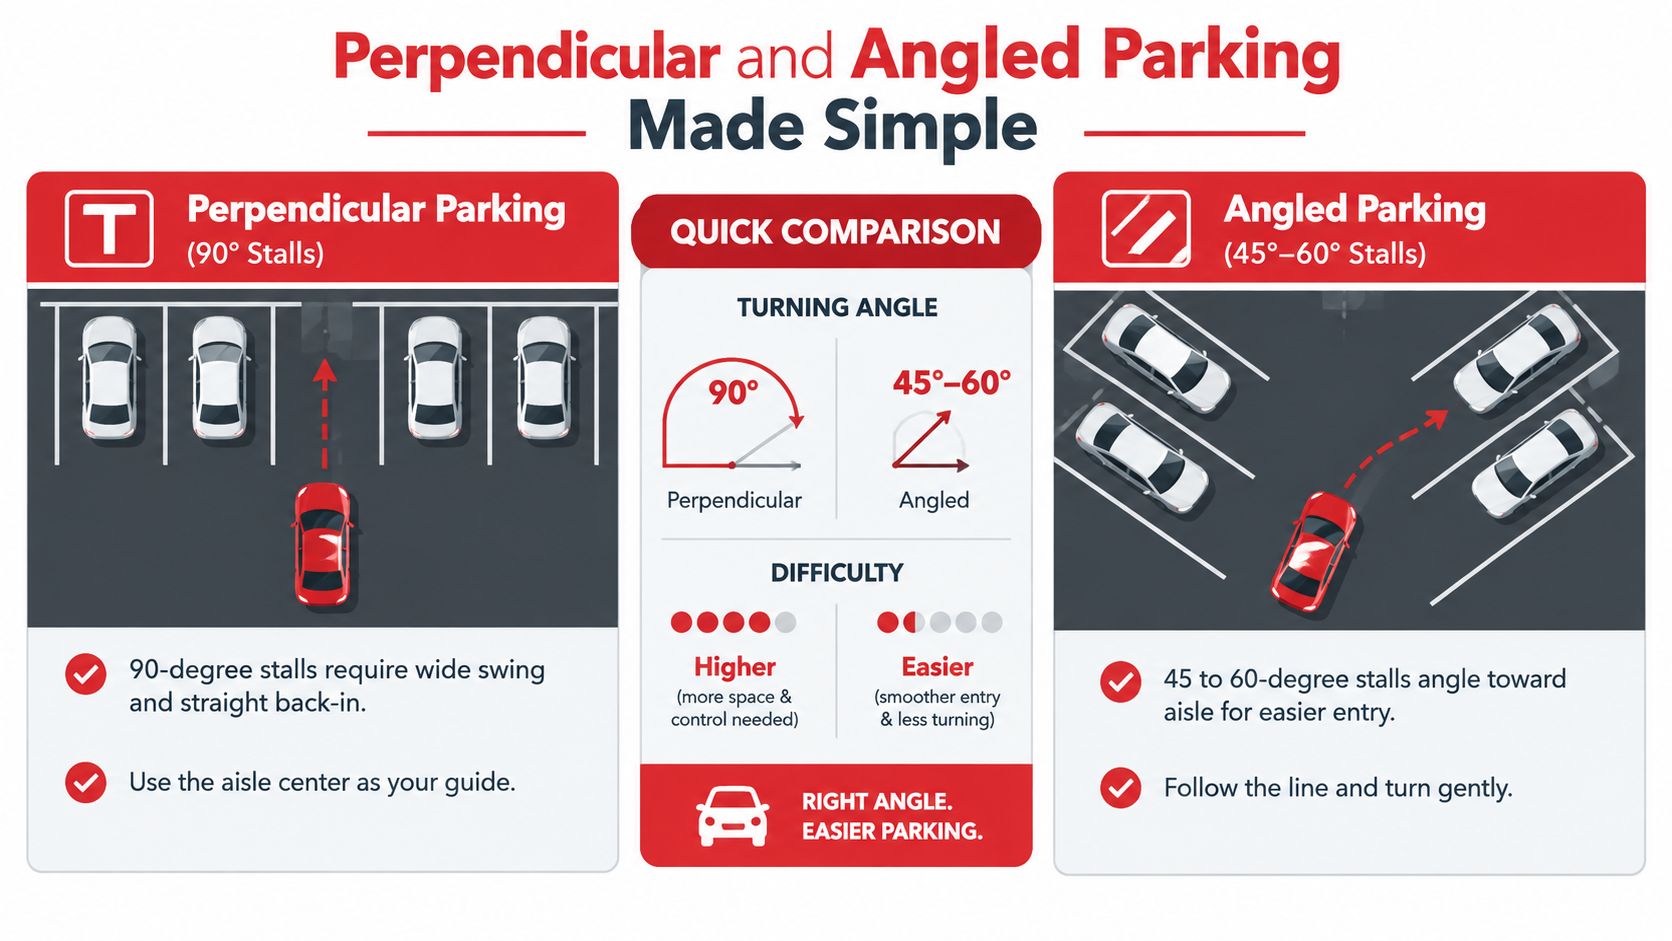
Perpendicular parking and angled parking look similar from the driver's seat, but their geometry changes the steering timing. A perpendicular stall forms a 90-degree T with the aisle. An angled stall, commonly between 45 and 60 degrees, points the vehicle toward the aisle and creates a shallower entry arc.
Controlled parking research identifies 45-degree angled parking as a Pareto-optimal configuration for stability and speed, with an average maneuver time of 7.54 seconds. The same parking-sector strategy document reports that vertical parking in narrow aisles can become a bottleneck, with the 85th percentile exceeding 50 seconds, while exit maneuvers take about 54% of the time needed for entry. These figures come from the UK Parking Sector Skills Strategy, and they illustrate why aisle width and stall geometry affect consistency.
Perpendicular parking
Signal early and reduce speed before reaching the target stall. Keep the aisle wide enough for the vehicle's turning path, then use the left door mirror as your reference. When your hips reach the left line of the target space, turn the wheel fully and creep forward.
As the vehicle enters, look through the space rather than staring only at the nearest line. Straighten the wheel when the car is centered between the lines. If you turn too soon, the front corner may cut across the neighboring stall. If you turn too late, the vehicle may end up angled or require a large correction.
Angled parking
Approach with a wider, smoother arc. Align the first sideline of the space with the passenger-side mirror, then ease forward with one continuous turn. Because the stall already points toward the aisle, you usually don't need the sharp steering input used for a tight perpendicular entry. Straighten as the wheels reach the curb line or the end of the stall.
Reference points vary by vehicle. A removable dot on the hood can help you create a custom landmark, but test it in an empty area first. Before shifting to Park, check both side mirrors and confirm that the car is inside the lines, the front is clear, and nothing is hidden beside the vehicle. More reverse-specific guidance is available in these reverse parking techniques.
Common Parking Mistakes and Quick Fixes
A learner may know the correct steps and still make the same mistake under pressure. From the passenger seat, I'd correct the action at the moment it occurs, then have the driver repeat the maneuver more slowly.
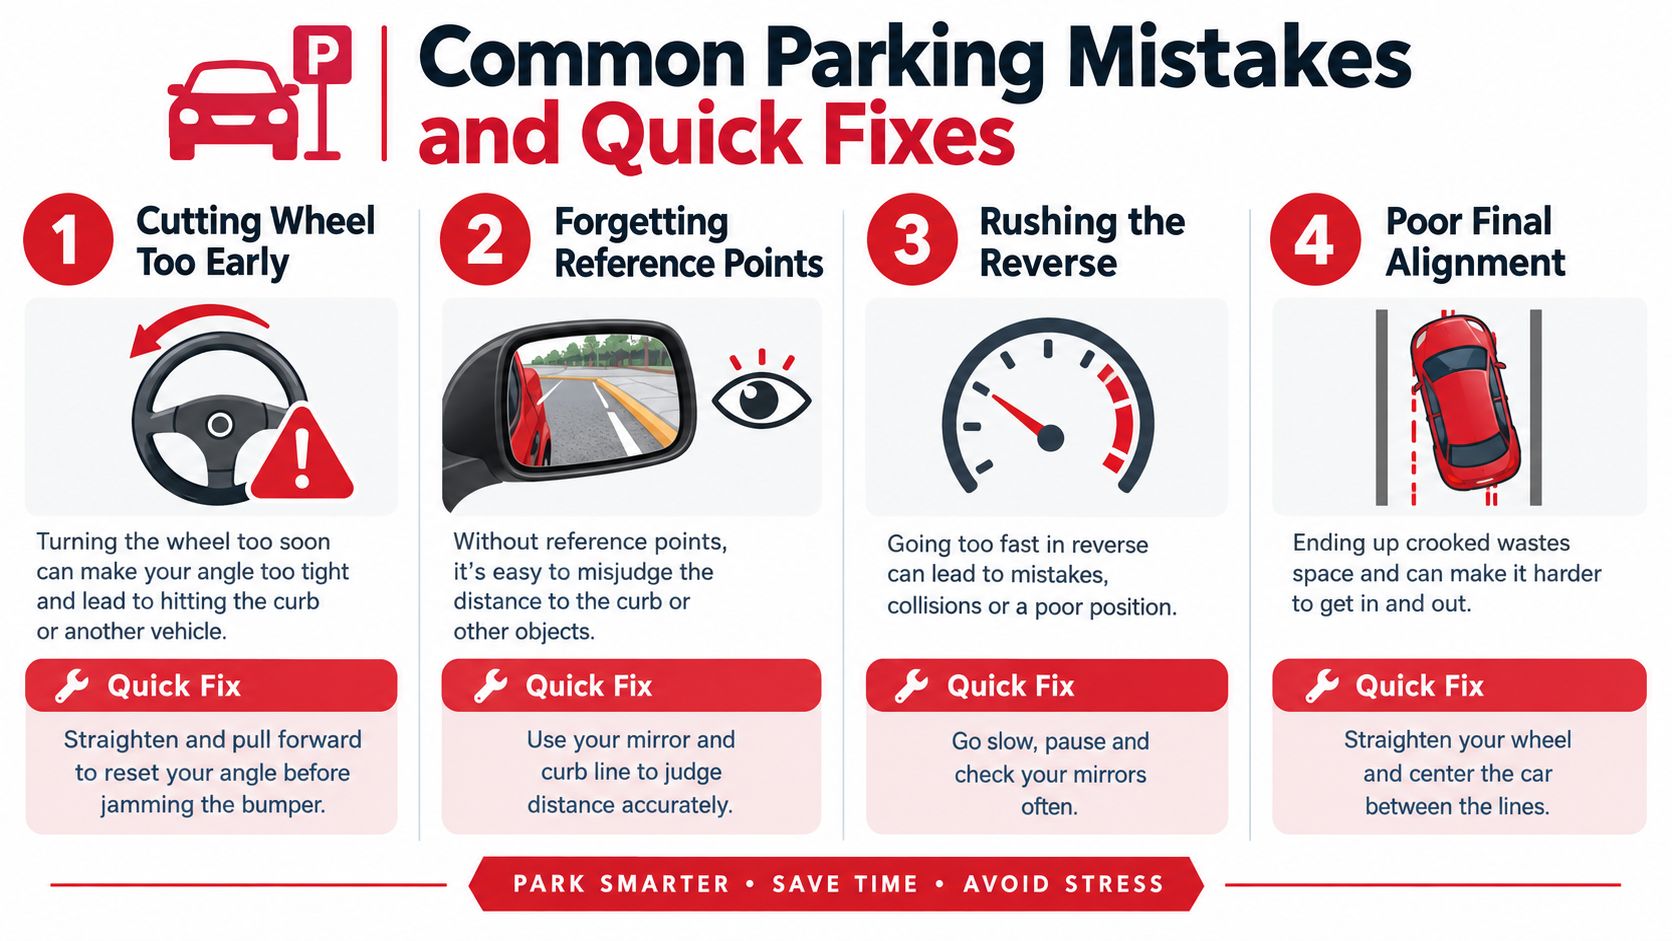
Cutting the wheel too early: In parallel parking, turning before the rear bumper clears the rear car sends the front bumper toward the curb or the neighboring vehicle. Wait for the reference point, then make the sharper turn.
Reversing without a full check: A backup camera shows a limited view and can make objects appear farther away than they are. Stop, look over your right shoulder, scan both mirrors, and check the camera before every reverse movement.
Driving too deep into a perpendicular stall: Learners sometimes keep moving because the stall appears open ahead. Commit slowly and stop as soon as the front bumper nears the curb line or the safe end of the space.
Correct the setup before correcting the steering
Drifting across stall lines often begins before the car moves. Poorly adjusted mirrors make the learner guess at the car's position, then produce a series of hurried steering corrections. Reset the mirrors before each practice session and choose one line to track.
A parking-assist system can help with steering, but it cannot decide whether a space is safe for your particular vehicle. Scan for posts, carts, low barriers, pedestrians, and overhanging mirrors before engaging it. Semi-automated features can also mislead you in low light, tight spaces, or crowded lots.
Backing out of a parking space deserves extra care. A Transportation Research Board record cites a study in which 90% of North Carolina parking-related fatal and serious-injury crashes occurred during a back-out maneuver. The study record supports a simple habit: reverse only after checking the area, move slowly, and stop when your view changes.
A Two-Week Practice Plan That Actually Works
Practice improves faster when you record what happened instead of relying on memory. Use a notebook or phone note with four fields: maneuver, starting conditions, what went wrong, and the next adjustment. End every session with a 60-second note about what felt easier and what still needs attention.
Week one builds control
- Days one and two: Spend 20 minutes in a parked car adjusting the seat, mirrors, and reference point. Practice identifying what each mirror shows without moving.
- Day three: Practice perpendicular parking with cones in an empty lot for 30 minutes. Focus on speed, the left-mirror reference, and final centering.
- Day four: Move to angled spaces in a low-traffic strip mall. Use one smooth arc rather than a sharp steering crank.
- Day five: Try parallel parking on a residential street with a spotter. Stop and reset whenever you lose the reference point.
- Days six and seven: Repeat the weakest maneuver 10 times each and log your completion times. A slower, controlled attempt counts as better practice than a rushed attempt with a correction.
Don't chase speed during the first week. The aim is consistent positioning, not impressing a waiting driver.
Week two adds realistic pressure
- Day eight: Parallel park in light traffic while keeping the same calm sequence.
- Day nine: Practice in a well-lit lot at night, using mirrors and visibility systems without depending on one screen.
- Day ten: Try tighter spacing with vehicles on both sides, only when the earlier drills feel stable.
- Day eleven: Test park-assist features with the system on and off. Compare what the car detects with what you see.
- Day twelve: Simulate a timed skills check, but stop if speed causes unsafe decisions.
- Day thirteen: Complete a real errand using the parking method you've practiced.
- Day fourteen: Reassess the seat, mirrors, reference point, scanning, steering, and final alignment checklist.
A useful log might say, “Entered too fast, missed the right mirror reference, corrected after stopping.” That note gives you a specific target for the next session. “I'm still bad at parking” doesn't.
When to Level Up With Professional Driving Lessons
Self-practice works well when you can identify the error and change the next attempt. Professional instruction becomes the smarter choice when you repeat the same problem without understanding why it happens.
Book an assessment when you regularly strike the curb, can't judge the space in a busy lot, panic in a multi-level garage, or make large steering corrections on hills. These patterns usually involve more than one isolated mistake. An instructor can watch your speed, eye movement, hand position, and reference timing at the same time.
A structured lesson package can include an in-car assessment, parallel and reverse drills, perpendicular and angled parking, highway exposure, and a readiness evaluation aligned with the Georgia Department of Driver Services road test. That combination matters because parking shouldn't be taught as an isolated trick. You need to connect low-speed control with observation, lane positioning, traffic awareness, and the decisions required before a test appointment.
Georgia pathways for new drivers
Georgia's Joshua's Law applies to 16- and 17-year-olds seeking a Class D license. The requirements include an approved driver education course and 40 hours of supervised driving, including 6 hours at night. Georgia allows four approved pathways that combine either 30 hours of classroom instruction or 30 hours of online instruction with either 6 hours of behind-the-wheel training at a certified school or 40 hours of parent-taught behind-the-wheel training. The Georgia DDS Joshua's Law requirements provide the official pathway details.
The Georgia Driver's Education Grant Scholarship Program helps eligible students complete a course with 30 hours of classroom training and 6 hours of behind-the-wheel training. Applicants must be Georgia residents ages 15 to 17 with a valid Georgia instructional permit or driver's license. The Georgia scholarship rules explain the eligibility framework.
Before scheduling or taking the Georgia road test, you need a valid Georgia non-commercial learner's permit, must pass the driver's license knowledge exam, and must sign an affidavit confirming 40 hours of supervised driving with 6 hours at night. Those requirements are listed by Georgia DDS road-test guidance.
A-1 Driving School offers teen and adult driving lessons, Joshua's Law classroom and online course options, behind-the-wheel training, road-test preparation, and testing assistance. Start with one assessment lesson if you're unsure where you stand, then choose a lesson package based on the skills that need the most work.
A-1 Driving School can help you turn parking practice into structured teen or adult driving lessons, with Joshua's Law course options, behind-the-wheel packages, and Georgia road-test preparation. Visit A-1 Driving School to review available training options and schedule the next practical step.